- PagerDuty /
- Integrations /
- Cherwell Integration Guide
Cherwell Integration Guide
⚠️ The Integration is no longer being actively developed or maintained
PagerDuty + Cherwell Integration Benefits
- Trigger, acknowledge and resolve incidents between Cherwell and PagerDuty.
- Priorities are automatically synced between PagerDuty and Cherwell.
- Enables highly customizable workflows and logic.
How it Works
- As a helpdesk system, incidents are often manually created in Cherwell, but it is possible to configure tools which send emails for automated incidents. Events from Cherwell will trigger a new incident on the corresponding PagerDuty service, or group as alerts into an existing incident.
- Acknowledging and resolving incidents in PagerDuty will send acknowledge and resolve events to Cherwell.
- Acknowledging and resolving incidents in Cherwell will send acknowledge and resolve events to PagerDuty.
Requirements
- In Cherwell:
- In order to configure this integration, you will need Cherwell Administrator Access, Cherwell Service Management Access, and Cherwell enabled on your PagerDuty account.
- A Cherwell system of 9.4 or later is required.
- In PagerDuty:
- The Cherwell integration is only available to accounts on Business or Digital Operations plans. Please contact our Sales Team if you would like to upgrade to a plan featuring the Cherwell integration.
- PagerDuty integrations require an Admin base role for account authorization. If you do not have this role, please reach out to an Admin or Account Owner within your organization to configure the integration.
Integration Walkthrough
In PagerDuty
- Navigate to the Integrations menu, select API Access Keys and then click the Create New API Key button.
- Keep this key in a safe place for later use, as you will not have access to it after this screen. You can now proceed to the In Cherwell section below.
In Cherwell
- In your Windows environment, access Cherwell Administrator and download the Cherwell-PagerDuty.mApp file.
- Open Cherwell Administrator and select mApps under Categories, and then click Apply a mApp under Pick a task....
- Select the Cherwell-PagerDuty.mApp file.
- Follow through the prompts:
a. Add your Integration Key (generated in the section above) when prompted.
b. When asked to specify the PagerDuty Base URL, enterhttps://app.pagerduty.com. - After applying the mApp file, open up the Security Settings under Common Tasks and go to Edit REST API client settings where you can retrieve a ClientID that will allow PagerDuty to communicate with Cherwell.
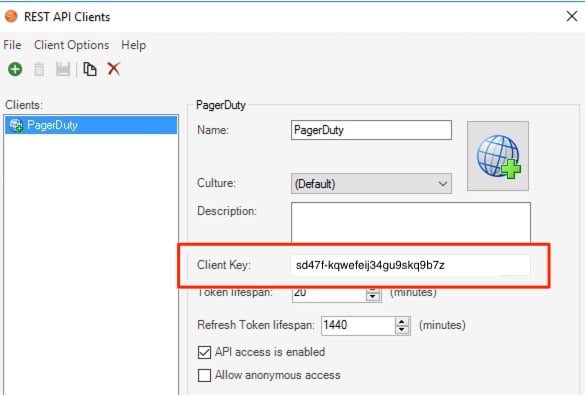
- To create a new entry, click the green ⊕ button and enter a Name. Copy the Client Key and keep it in a safe place for later use.
- Create a PagerDuty User within Cherwell. This user will be used by PagerDuty to create and update incidents within Cherwell.
In PagerDuty (Cont.)
- Go to Services and select Service Directory.
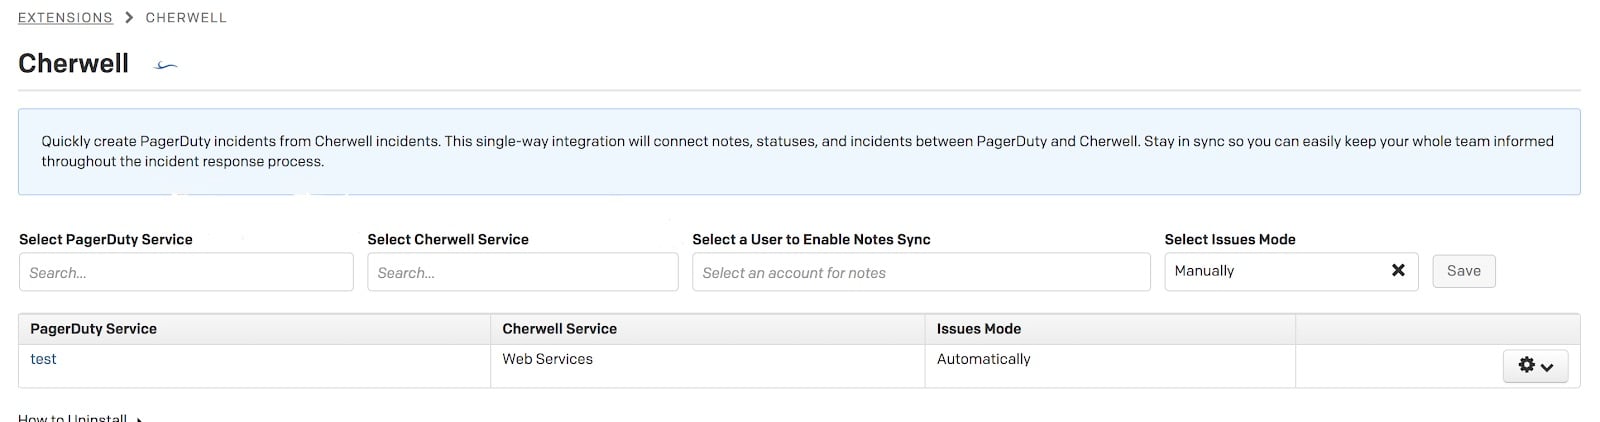
- Add Cherwell as an extension to the service(s) you would like to integrate with.
- Provide the Cherwell URL, username, password, and Client Key when prompted in Cherwell Authentication.
- Select the Services that you want PagerDuty and Cherwell to sync.
- You should now be able to trigger an incident in PagerDuty and open it in Cherwell. If this is unsuccessful, please go back and verify that you've input your PagerDuty Integration Key and Cherwell credentials correctly.
FAQ
How do triggered and acknowledged states translate to Cherwell?
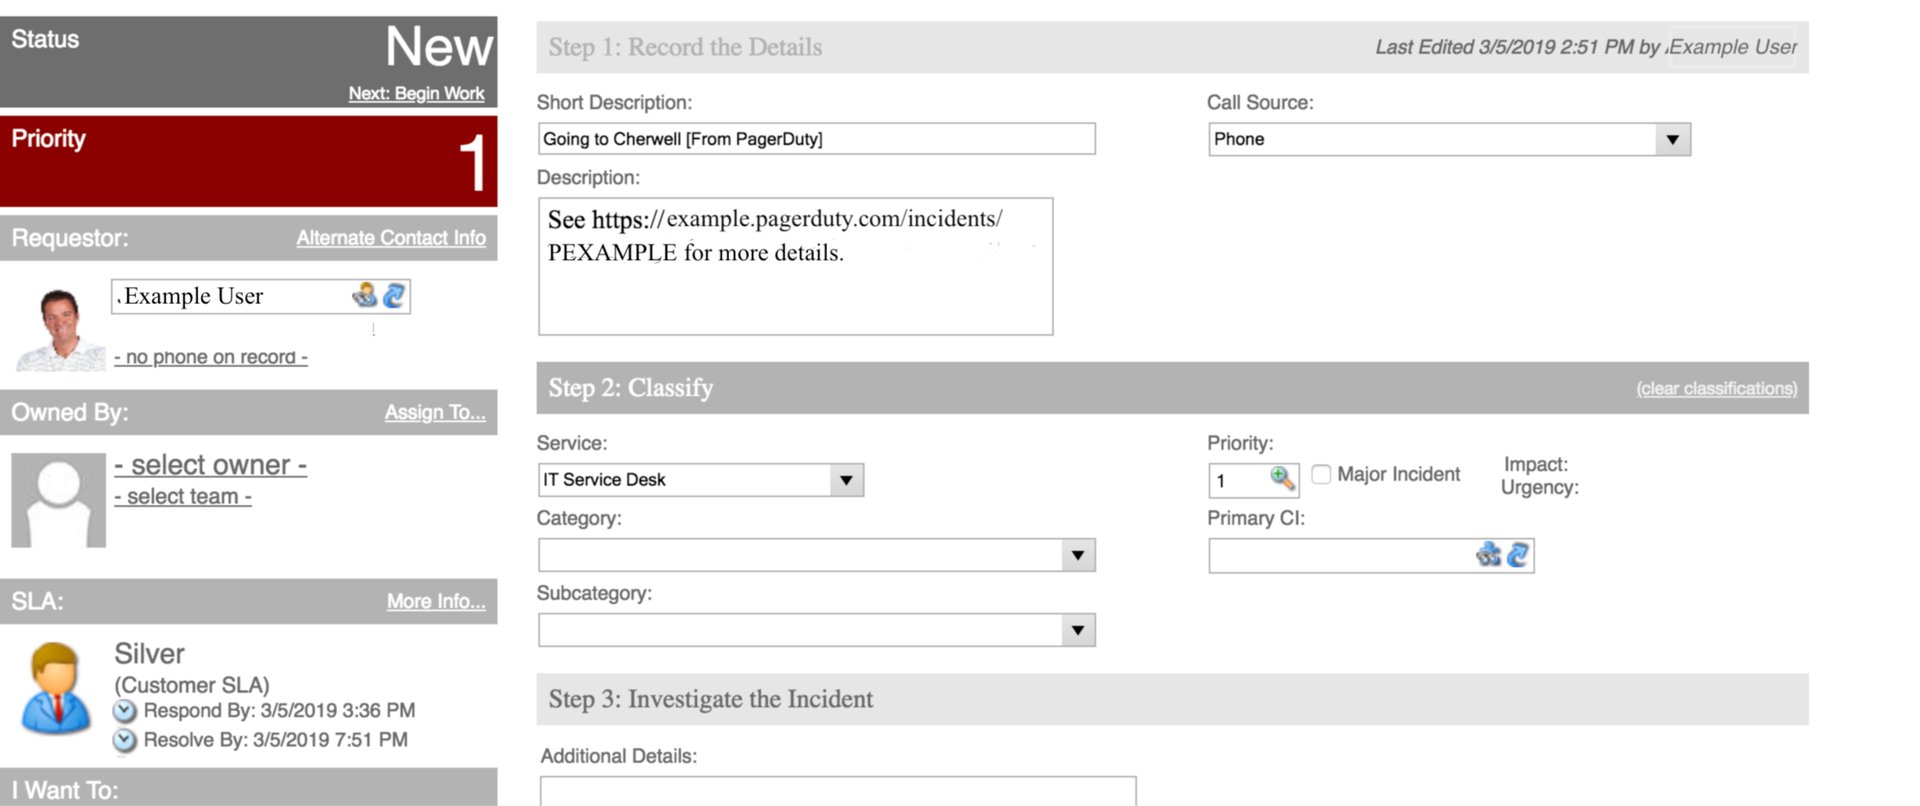
A triggered state in Cherwell is New, and an acknowledged event is In Progress. Like PagerDuty, an incident that has been taken care of is classified as being in a Resolved state.
Ready to get started?
Try any product on the Operations Cloud for free.
No credit card required.