- PagerDuty /
- Integrations /
- Kayako Classic Integration Guide
Kayako Classic Integration Guide
Kayako is simple customer service software that scales with your business. Kayako makes it easy to deliver an unrivaled customer support experience. This guide will walk you through how to integrate Kayako with PagerDuty, allowing your staff to receive notifications from PagerDuty when a support ticket is created or updated in Kayako. You can also set up optional email parsing rules to allow Kayako to resolve PagerDuty incidents when your Kayako tickets are closed; steps to configure this will also be outlined in this guide.
If you are using Kayako, click here for the integration guide.
Lastly, if you have any trouble setting up your integration, please contact us.
In PagerDuty
- Go to the Services menu and select Service Directory.
- On the Service Directory page:
- If you are creating a new service for your integration, click +New Service and follow the steps outlined, selecting this integration in step 4.
- If you are adding your integration to an existing service, click the name of the service you want to add the integration to. Then click the Integrations tab and click Add a new integration.
- Under Select the integration(s) you use to send alerts to this service search and select this integration.
- Click the Add Service or Add Integration button to save your new integration. You will be redirected to the Integrations page for your service.
- Find the integration in the list, click the v dropdown on the right and copy the Integration Email.
In Kayako
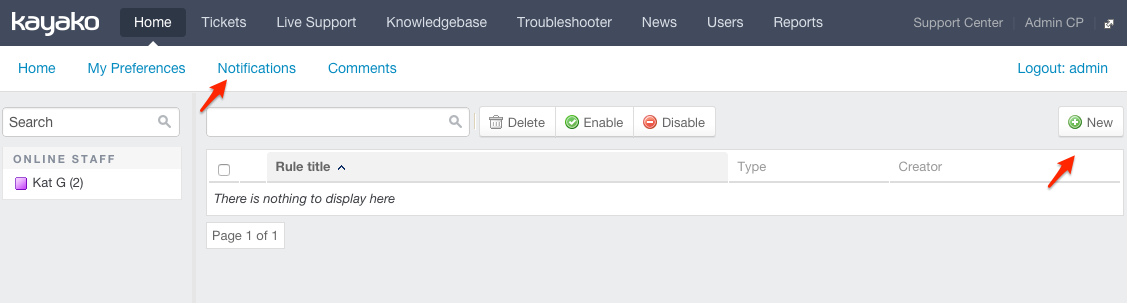
- Visit your Staff CP (https://yoursubdomain.kayako.com/staff, or click Staff CP while logged into the Admin CP), click Notifications, then click New. You can also click the name of one of your existing rules if you would like to configure these to send to PagerDuty.
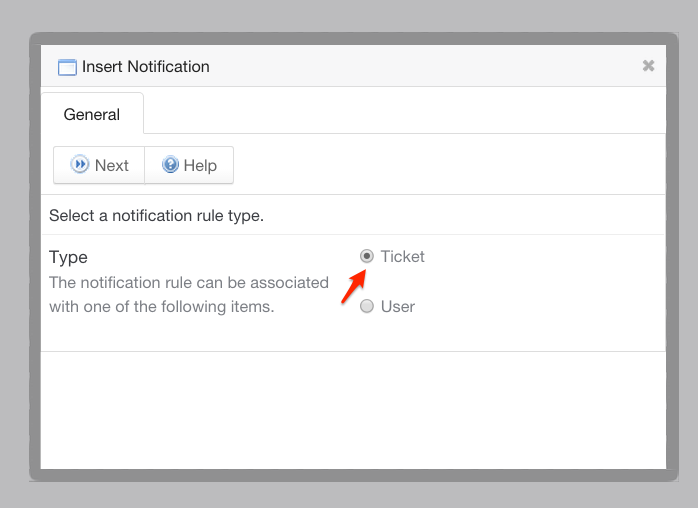
- You can create notification rules based off of individual ticket options, or user options. For this guide, we'll use the example to create a PagerDuty incident when a new Kayako ticket is created, and for email parsing, to resolve the PagerDuty incident when a Kayako ticket is marked closed. In the Insert Notification dialog that appears, select Ticket and click Next.
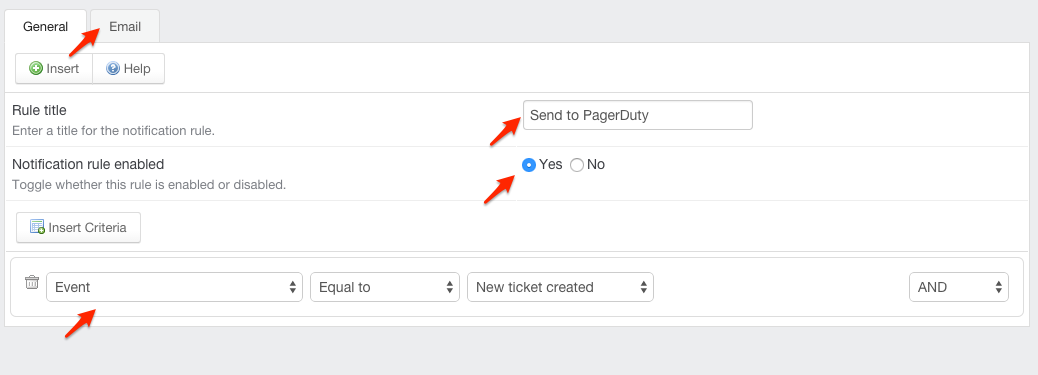
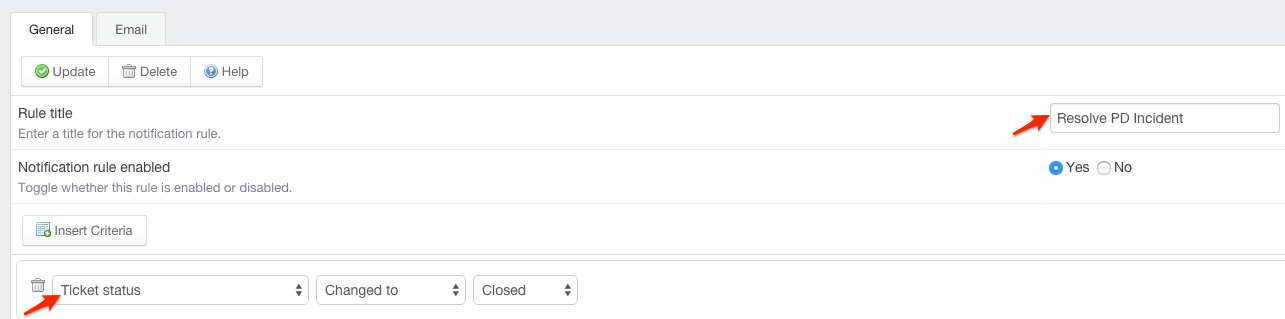
- In the General tab, give your rule a title, make sure it is enabled, and select the criteria under which you want this rule triggered. You can choose/combine the criteria which work best for your team, but for this example we'll use Event: Equal to: New ticket created to trigger a PagerDuty incident whenever there is a new ticket created in our Kayako helpdesk.
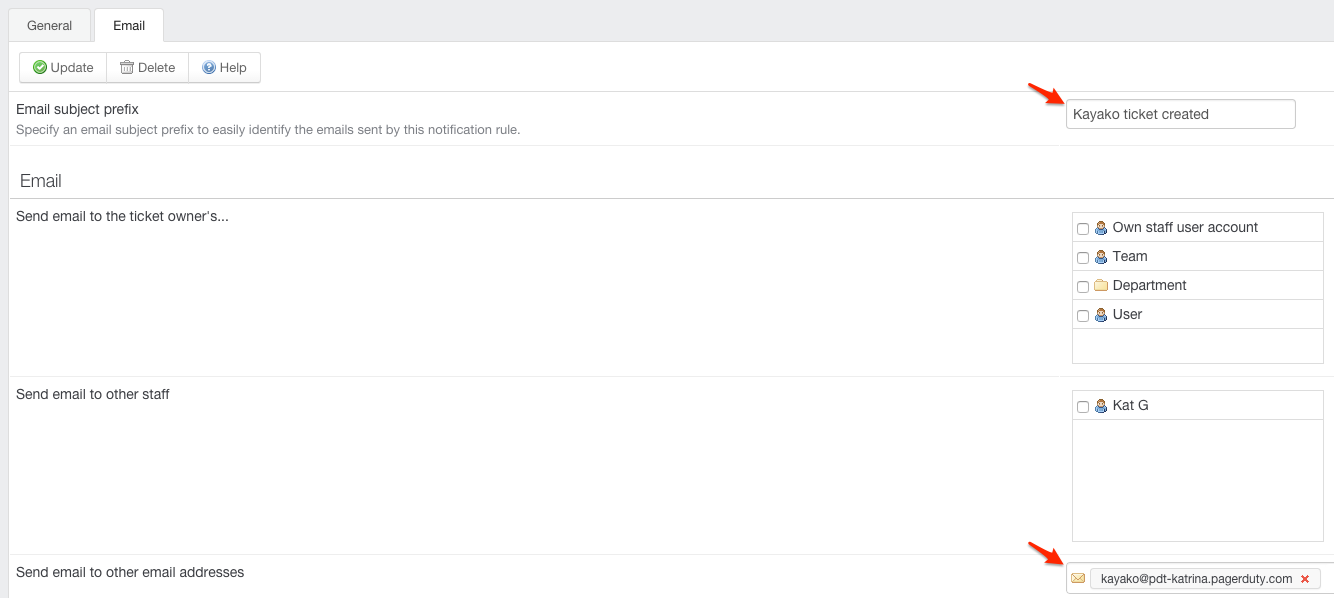
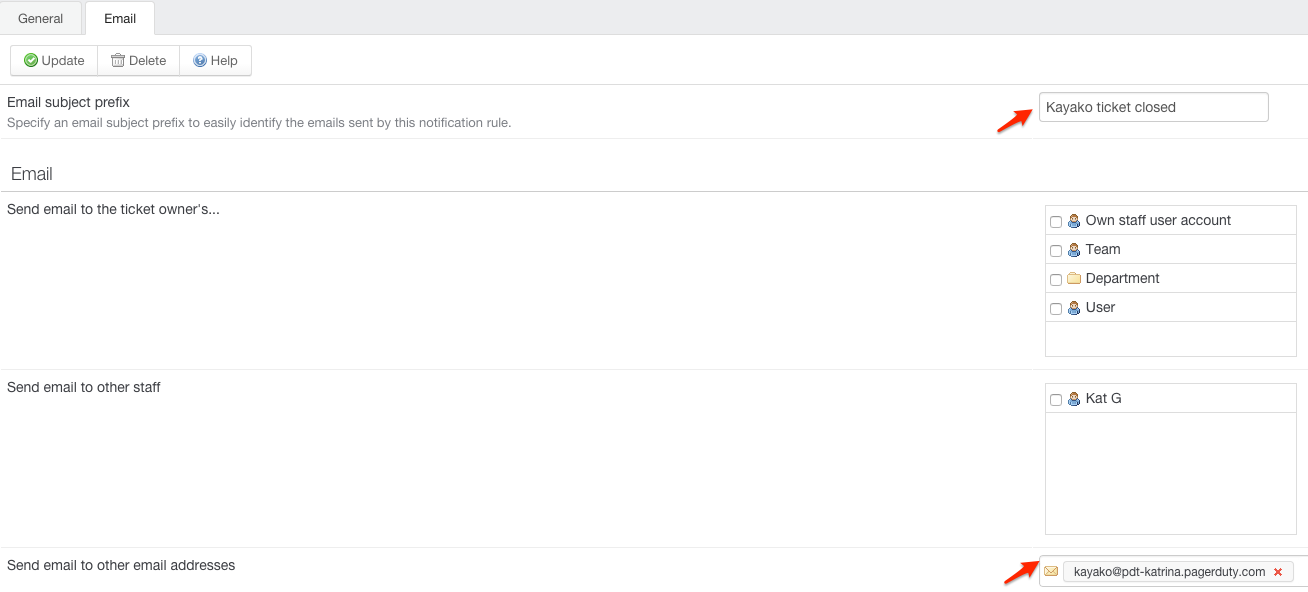
- Once you've filled in your criteria in the General tab, switch over to the Email tab. Write a prefix for your email subject that will help you identify in PagerDuty what has happened (Kayako will automatically send over the ticket number) and in the Send email to other email addresses field, fill in the integration email address that you copied from your PagerDuty service. You can now click the Insert button (if creating a new rule) or Update button (if modifying an existing rule) to save your changes.
- To test, create a new support ticket in your Kayako helpdesk. You'll see a new incident created in your PagerDuty service with the ticket number, prefix that you set, and customer's subject line in the Details summary, and more information about the support ticket details and requester in the email body when you drill down into the incident.
Configuring Kayako to resolve PagerDuty incidents
- If you would like Kayako to resolve PagerDuty incidents based on different criteria (for example, when a ticket is closed), you can follow the same steps as the In Kayako section above, however, you'll select different criteria and write a different prefix in your notification rule. We're using Ticket Status: Changed to: Closed for criteria in the example below, and Kayako ticket closed as my email subject prefix. The rule should send to the same integration email address as well.
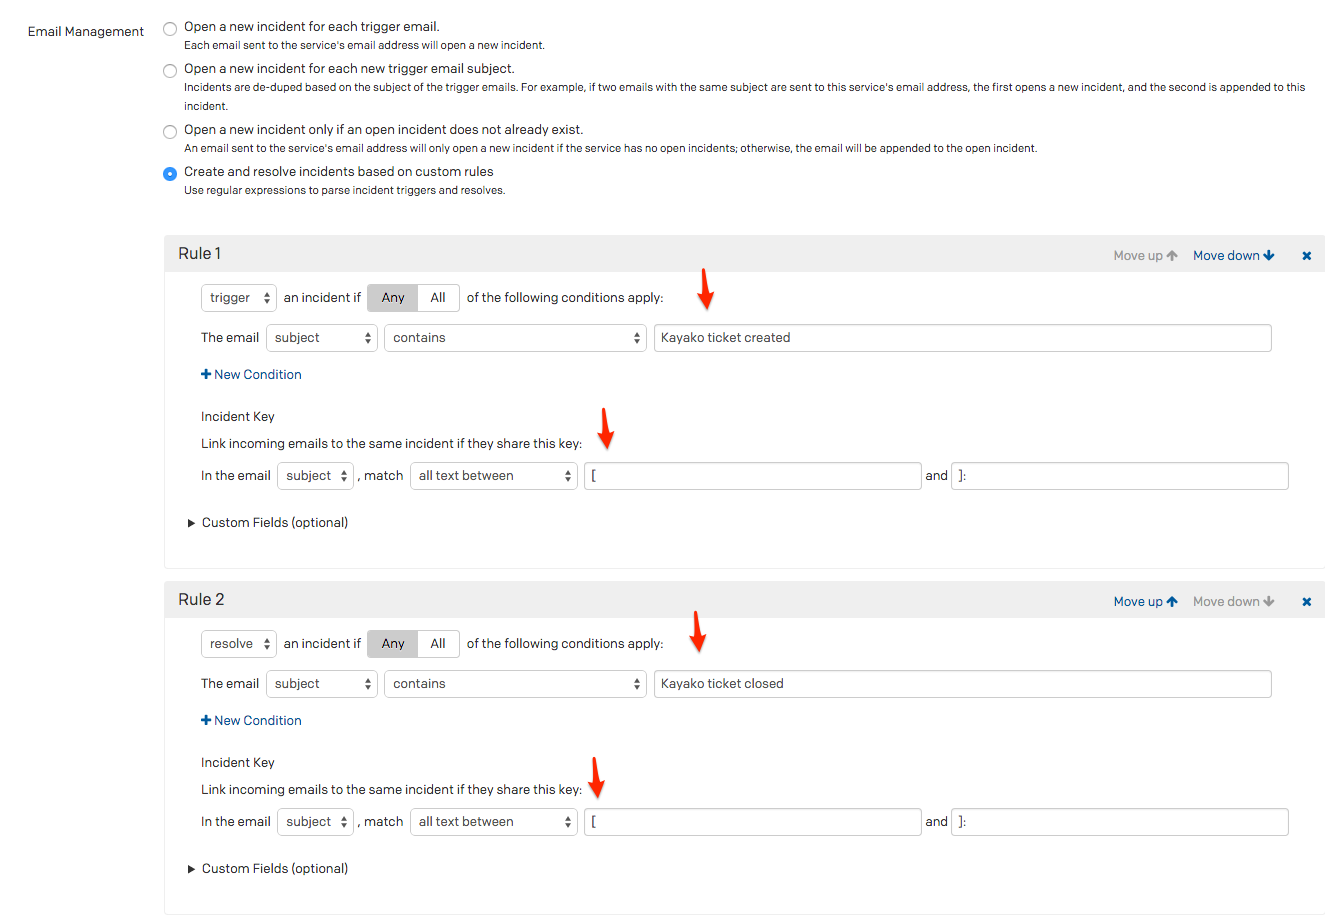
- In PagerDuty, you will need to configure email parsing rules to determine when an incident can be triggered and resolved in your Kayako service. Navigate to Services → Service Directory → select your Kayako service from the list → select the Integrations tab → find the Kayako integration → click the settings cog → click Edit Integration to open the service's edit view. Your rules will vary based on the notification rules you created in Kayako, but in the example below, incidents are triggered if the email subject contains the trigger email subject prefix (Kayako ticket created) and resolved if the email subject contains the closed ticket email subject prefix (Kayako ticket closed). Kayako sends the ticket numbers in the format [!1]:, so we set the Incident Key to match all text between [ and ]: in the email subject. For ticket #1, this means the incident key will be pulled as !1.
- To test, create a new ticket in your Kayako helpdesk. You'll see a new incident in PagerDuty created as in Step 5 of the In Kayako section of this guide, and in the incident details, you'll see the incident key field display information matching the incident key rules you created. Then, in Kayako, change the status of the same support ticket to Closed. You'll see your PagerDuty incident auto-resolve, and a message appear in the Incident Log stating that the incident was Resolved by email, with a message subject matching your Kayako closed notification rule prefix.
FAQ
Can PagerDuty close or comment on tickets in Kayako?
At this time, no. If you would like to see a bidirectional integration made possible in the future, please contact support to submit this request.Can I customize the criteria by which Kayako will trigger and resolve events in PagerDuty, and customize the information in the email sent to PagerDuty by Kayako?
Yes. You can read more about configuring Notification Rules, criteria, and the templates which determine the email body in Kayako's knowledgebase here.Ready to get started?
Try any product on the Operations Cloud for free.
No credit card required.