- PagerDuty /
- Blog /
- Best Practices & Insights /
- Build Sophisticated Apps for Your PagerDuty Environment Using OAuth 2.0 and API Scopes
Blog
Build Sophisticated Apps for Your PagerDuty Environment Using OAuth 2.0 and API Scopes
by Mandi Walls
October 26, 2023
| 9 min read
Many PagerDuty customers create their own apps to help them manage their PagerDuty environments. Teams might have any number of workflows that might benefit from a custom application. A PagerDuty admin might want to be able to load CSV files with new users and their contact information into PagerDuty when new teams join the platform, or load new services before they are released to production. Creating custom applications for PagerDuty can help with those administrative tasks when another component is the System of Record for that data.
In May, we looked at updating custom tools for API Scopes vs PagerDuty’s original API keys, and used the application itself to request the tokens (via some scripts), but developers can also allow users to log in to an app and authenticate against PagerDuty itself to control which objects will be available.
Logged-in users will only have access to the objects they would also be able to see via the web UI, and their access will also be constrained by the scopes of the application you build. The combination of permissions and scopes provides comprehensive control over which users can see and modify which objects, whether via the web UI, API or custom apps.
We’ll use a sample application that our engineering team has published as an example.
Part of the workflow will happen in the PagerDuty UI, and part will be on your workstation. To work through all the steps, you’ll need to be an administrator on your PagerDuty account, and be able to run Python apps on your workstation.
We’ll create an app as a PagerDuty admin, and part of the workflow of the app itself will be to request the user to login to PagerDuty. The app will then only be authorized to access objects that the logged-in user can access, that have been included in the scopes for the app.
Register an Application
This workflow will be similar to what we saw in the earlier blog post, but there’s a new feature that will make things easier!
Our sample app will need to be registered with PagerDuty in order to provide access to PagerDuty objects. For a detailed description of the app registration process, see the developer docs.
Only account admins are able to create applications using the Scoped OAuth 2.0 features. (Regular users can still create their own applications, but the features are limited to Classic User OAuth.)
In your PagerDuty account, open the Integrations menu at the top of the screen and click App Registration in the Developer Tools column. Add a new app using the button on the right, or you can update an existing app.
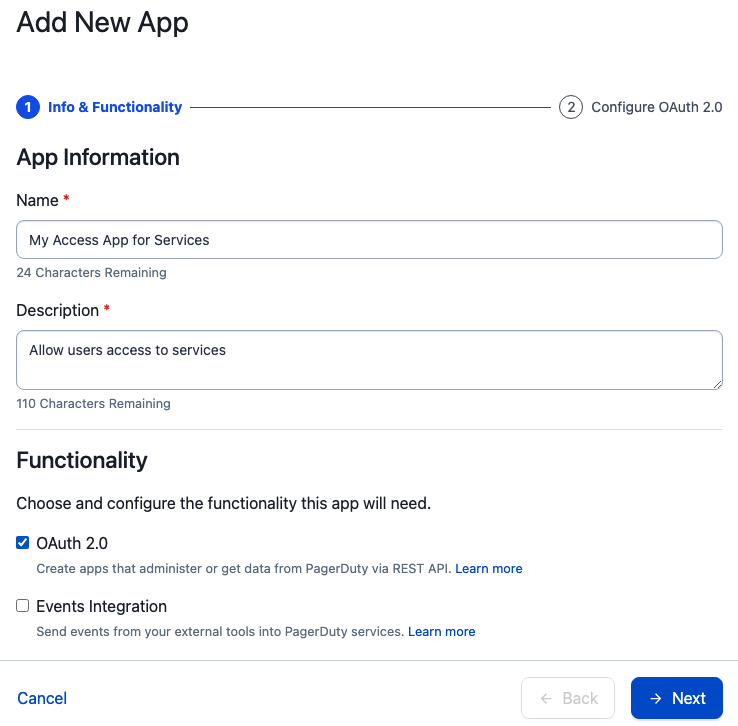
Give your app a name, a description, and select “OAuth 2.0”, then click “Next”:
On the next page, “Scoped OAuth” is selected by default; leave that selected. In the next section, we want to add a “Redirect URL” for our sample app. In the OAuth flow, the callback is the location of the application your users will be using to access PagerDuty objects, and can be hosted anywhere users can access it. It doesn’t need to be publicly available, or accessible to PagerDuty.
Our sample app is built to run locally on your workstation by default, using localhost. Configure your redirect url for http://localhost:5000/callback. Note there’s no https! This is just a sample app and not meant for production.
Next, select the objects and access type you’d like to try out for your app. I’m going to start with Services but make it Read Access only:
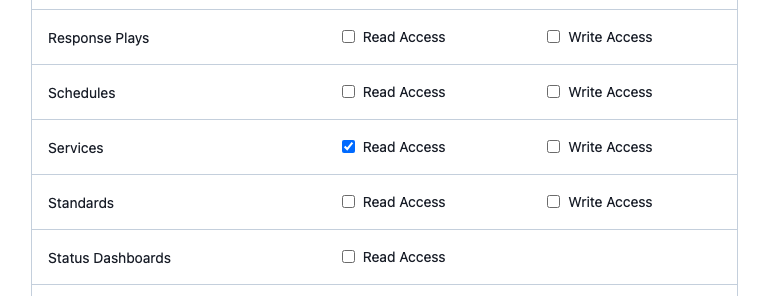
For our sample app to work, you’ll also need to add Read Access for the Users object!! Apps you build might not need this access! You can configure access to be as wide or narrow as you need for the tasks you need to complete. If you’re not sure which scopes apply to which objects, refer to the API documentation.
When you’ve chosen your scopes, click the Register App button at the bottom of the screen.
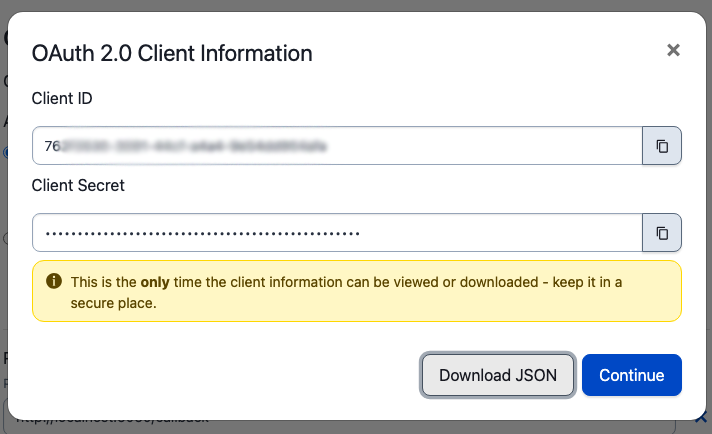
New Feature: You can now download a json file with your credentials! You’ll still only have one opportunity to do so. You’ll receive a json file with your client_id and client_secret in it. We’ll need those to configure our sample app, so click Download JSON and then Continue.
Using a Sample App to Fetch a New User Token
Once you have your app registered and have received the authorization json file, you can use the client_id and client_secret to request a token. This is a two-step process: retrieve an authorization code, and use that code to generate a token. Authorization codes are only valid for 30 seconds, so you’ll likely want to put both requests in the same tool or script even if you’re not writing a complete application.
You can also use one of our samples, for Python or Javascript / Node.js.
I’m going to use the Python example with a few tweaks. It’s a fairly simple Flask app that will use the authorization pieces we received from the PagerDuty app creation process, present the user with a login authorization screen, make the requests for me, and give me the token I can use for my own requests in scripts or with curl, similar to the examples in our earlier post.
Download, Configure and Run the Sample App
Follow the instructions in the Sample App README.md file to configure your app. You’ll use the contents of the json file you downloaded from the web UI – the client_id and client_secret – in the config.json file:
{
“PD_CLIENT_ID”: “xxxxxxxx-xxxx-xxxx-xxxx-xxxxxxxxxxxx”,
“PD_CLIENT_SECRET”: “xxxxxxxxxxxxxxxxxxxxxxxxxxxxxxxxxxxx”,
“REDIRECT_URI”: “http://localhost:5000/callback”
}
Once your config.json file is created, complete the rest of the steps to install the app dependencies. Depending on your environment and which versions of Python you have installed, you may need to use the python3 command:
- Create a virtual environment for python: python -m venv env
- Activate the environment: source env/bin/activate
- Install dependencies: pip install -r requirements.txt
- Run the app: python app.py
If you receive an error message about the port being in use, you can update to a different port in the app.py file, on the last line.
NB: if you have to move the port your app.py is running on, you’ll need to go back up to the configuration steps in the UI and change your redirect uri. Make sure to save all of your changes!
Login and Retrieve Your Token
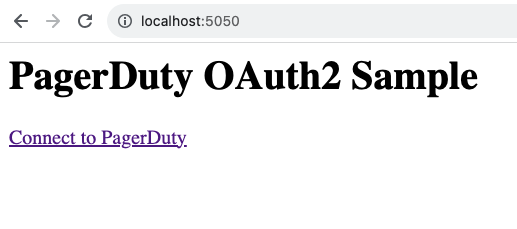
When app.py is running, you’ll be able to open the url in your browser and login to PagerDuty:
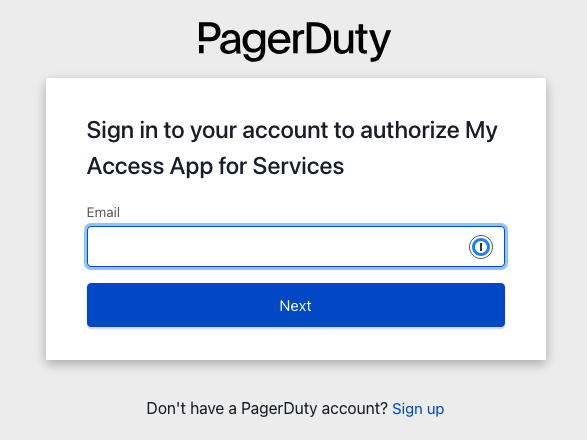
When you click on the “Connect to PagerDuty” link, you’ll be redirected to a login page hosted on identity.pagerduty.com:
This workflow keeps your account secure. Your team logs in to PagerDuty directly, and the tokens are used to convey authorization. Your application doesn’t have to handle authentication or authorization! Let PagerDuty handle it.
Login with your username and password. PagerDuty will ask you to authorize the app to your account:
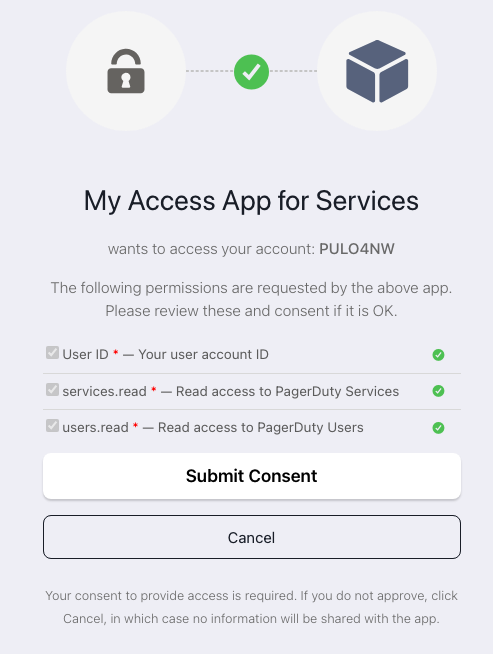
Click “Submit Consent”. You’ll be sent back to your redirect_uri, in this case, the app.py on localhost.
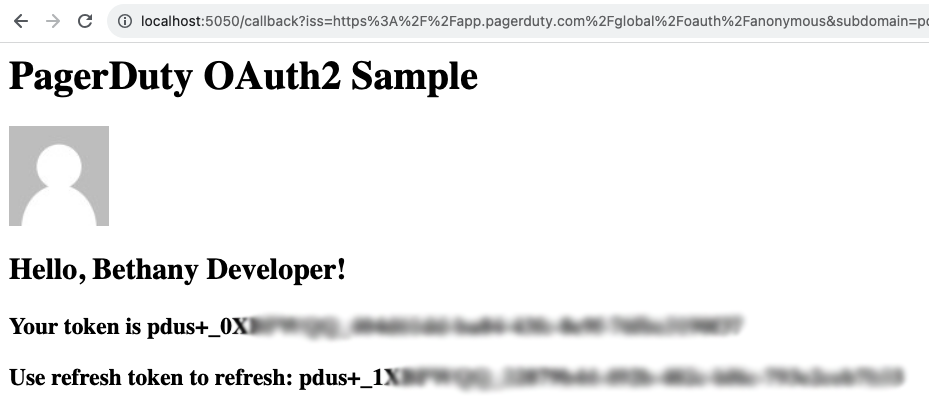
Your token will be part of the information returned to the app, and is part of the body of the return data. You can change the code a little bit to print it to the page. I’ve added token and refresh_token to my output as an example:
This token is now yours to use in scripts and tools, in whichever language you choose. Incorporate it into your API requests as the “Authorization” header:
Authorization: Bearer pdus+_xxxxxxxxxxxxxxxxxxxxxxxxxxx
For example, here’s a shell script to request /services:
TOKEN=$PD_API_KEY
ENDPOINT=”services”
curl -X GET –header ‘Content-Type: application/json’ \
–url https://api.pagerduty.com/$ENDPOINT \
–header ‘Accept: application/vnd.pagerduty+json;version=2’ \
–header “Authorization: Bearer $TOKEN”
Unauthorized Scopes
Since our token has a very narrow scope, you’ll see an error if you try to use it to access anything other than services and users. If I tried to use this token to access the /incidents endpoint, I would receive the following error:
{“error”:{“message”:”Token missing required scopes”,”required_scopes”:”incidents.read”,”token_scopes”:”openid services.read users.read”}}
Timeouts and Refresh
Unlike our API Keys, OAuth tokens have a finite lifetime. The bearer token we received in the last section will only be valid for 24 hours. The sample app code does not have an option to refresh tokens, so requesting a fresh token is easiest; just return to the first URL and click the “Connect to PagerDuty” link again to get a new token.
When incorporating this flow into another app, you’ll want to make use of the refresh token so that users don’t have to login over and over. They can authorize their account and your application can manage the tokens on the backend and refresh as needed. For more information on using the refresh tokens, check out the docs.
Revoke Tokens and Delete Applications
If you need to revoke the tokens for an application, you can do that on the Client panel of the configuration page. You can revoke all active tokens for the application, and you can delete the Client itself and generate a new secret.
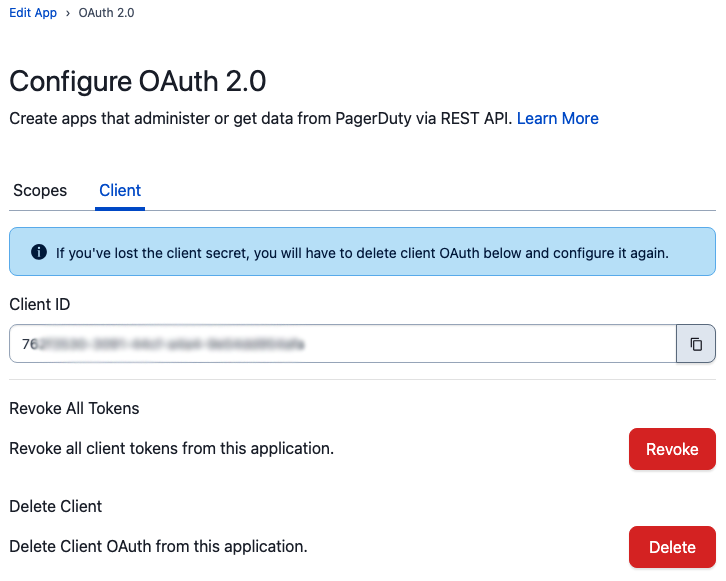
When you delete the Client OAuth from your application, you’ll need to update all of your code that might be using this application configuration to talk to PagerDuty.
After you’ve clicked Delete, you’ll be returned to the main Edit App screen. To create a new Client OAuth for your application, re-add OAuth 2.0 to your application in the same way as above.
If your team no longer has use for an app, you can now delete the entire app from your App Registration page:
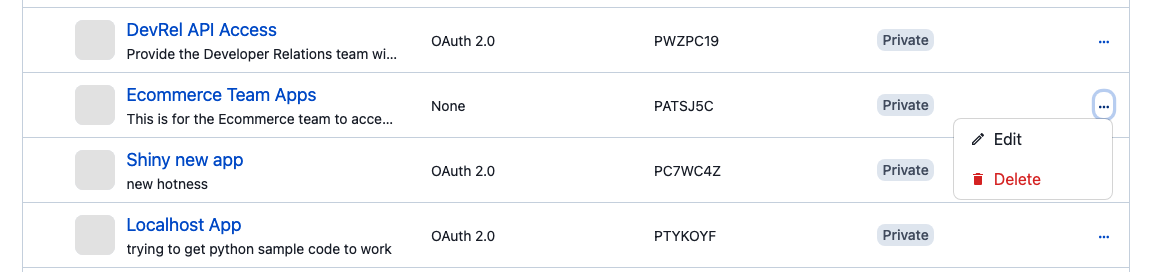
Just click the three-dots menu on the right side of your app’s listing, and select Delete.
Deleting the app deletes all the secrets and revokes all tokens.
Let Us Know What You Think!
Have you started using Scoped OAuth in your tools? Let us know! Join our Community Forums or reach out to community-team@pagerduty.com. We’d love to hear what you think of the new features and what you’re hoping to see in the future.